Ever felt your Shopify store menu is too basic or cluttered? A Mega menu is the solution you need, it helps you organize categories neatly, show more products, and make navigation super smooth.
In this blog, we’ll walk you through how to create a Mega menu in Shopify step by step. Whether you run a small online store or manage a large catalog, a well-structured Mega menu can boost user experience. It keeps things clean, clear, and easy for visitors to find what they need.
And the best part? You don’t need to be a coding expert to set it up. But if you want more control and smoother results, many store owners team up with expert Shopify developers to fine-tune their Mega menus. Want to improve your store’s navigation? Let’s get started.
How Shopify Navigation Works?
Before building a Mega menu, it’s important to understand how Shopify’s basic navigation system works. This helps you structure your links properly and makes the process much smoother, no matter which method you choose.
Shopify allows you to manage your site’s navigation through a simple drag-and-drop interface in the admin panel. You’ll find this under:
Online Store → Navigation
Here, you can create different types of menus:
Main Menu (typically used in the header)
Footer Menu
Custom menus for specific needs (like sidebar or mobile)
Parent and Child Menu Items
Menus are structured using parent and child items:
A parent item is the top-level link (e.g., “Shop”).
A child item is a sub-link that appears under a parent (e.g., “Men’s Clothing,” “Accessories”).
You can nest these links to create dropdowns. This nesting is essential for Mega menus because the menu layout is often based on these link hierarchies.
Where Menus Appear
Which menu appears where depends on your theme settings:
The Main Menu is usually displayed in the site’s header.
Footer and other custom menus are placed in different areas based on your theme configuration.
Some themes allow you to link a specific menu to a Mega menu feature, especially if they support Online Store 2.0 blocks.
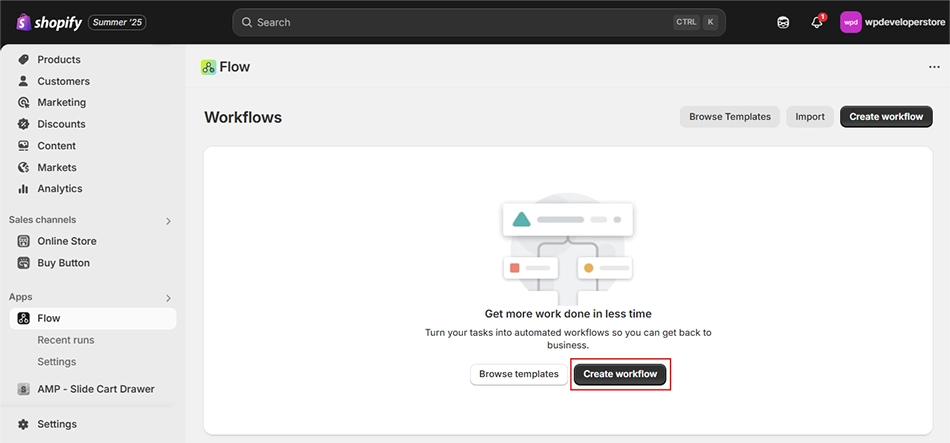
How to Build a Mega Menu in Shopify Using Theme Editor?
Shopify’s Online Store 2.0 makes it incredibly simple to create a functional drop-down or Mega menu without touching any code. You can do this directly from the Shopify admin dashboard by creating a structured navigation menu and enabling a visual layout style like a Mega menu from the theme editor.
The first part of the process involves setting up the menu items and submenus in the Shopify navigation panel. These steps will guide you through setting up drop-downs and submenus in a few easy clicks.
How to Add a Drop-Down Menu in Shopify?
Creating a drop-down menu in Shopify helps you organize products, categories, and pages under one parent link, making it easier for users to browse your store. It’s the first step towards building a Mega menu. Here’s how to set it up:
Step 1: Go to Your Menus
From your Shopify admin, head over to:
Online Store → Navigation → Menus
This is where you manage all the menus used in your store, including the main menu that appears in your site’s header.
Step 2: Open Your Main Menu
Click on the menu labeled Main menu (or whichever menu is your primary navigation).
This is typically the one linked to your site’s top navigation bar. Once inside, you’ll see all the existing menu items.
Step 3: Add or Choose a Header Menu Item
Now, choose which menu item will act as the main header for your drop-down. If you already have one, you can use it. If not, click the Add menu item, enter a name (like “Shop by Category” or “Products”), and assign a link.
Tip: Don’t want this header to link anywhere? Just enter # in the link field. That way, it’s just a clickable label that shows the dropdown when hovering or tapping.
Step 4: Add Submenu Items
Next, start building your sub-menu. Click the Add menu item again for each item you want in the drop-down. Give each submenu item a clear name and assign it a relevant link (e.g., a collection, product, or page).
Once added, drag each item slightly to the right under the main header to nest them as child items. You’ll notice a visual indent — that means Shopify now treats them as part of a dropdown.
Note: Don’t forget to click the ✓ check mark button for each item and then hit Save after structuring everything.
How to Display It as a Mega Menu?
Now that your menu structure is ready, let’s switch its visual style to a Mega menu layout using the theme customizer.
Go to Online Store → Themes → Customize
Click on the Header section or navigation block in the theme preview from the left pane.
Locate the menu item that has nested submenus.
Look for a setting like “Menu type” and under that, select the Mega menu as the menu type.
Save your changes and preview the menu on your storefront.
With just a few simple steps, you’ve not only added a drop-down menu but turned it into a visually rich Mega menu–no app or custom code required. This method is perfect for merchants who want to keep things simple while still improving store navigation.
How to Create a Mega Menu in Shopify Using Apps?
If you want more design freedom or prefer an easier way to build a fully-featured Mega menu, using a Shopify app is the way to go. Apps like Meteor Mega Menu & Navigation come with drag-and-drop editors, pre-built templates, icons, product images, and more — no coding needed.
We’ll walk through the process using the Meteor Mega Menu & Navigation app from the Shopify App Store.
Step 1: Install the App
Head to the Meteor Mega Menu & Navigation page in the Shopify App Store. Click Add app and follow the installation steps.
Once installed, pick your desired plan — the free plan works well for most basic setups, and we’ll use that for this demo.
Step 2: Access the App from Your Admin
After installation, go to Settings → Apps and sales channels → Meteor Mega Menu → Click on 3 dots from the right side → Click “Open app” from your Shopify admin dashboard.
Step 3: Launch the Menu Editor
Inside the app dashboard, click the Launch menu editor button. This will take you to the interface where you’ll create and customize your Mega menu.
Step 4: Add a Menu Item
Click the Add menu item. Fill up the form and click Add. This will add the menu entry.
Step 5: Manage Your Menu
In the Menus tab, find the generated menu and click Manage next to it. This opens up the full editor for customizing your Mega menu structure.
Step 6: Build the Mega Menu
Click Build Mega menu to open the template selection screen. Here, you can browse and choose from available templates.
For this guide, we’ll go with the free “Solar” template. Once selected, click Continue to move on.
Step 7: Assign a Shopify Menu to the Template
Now set up the menu content. Either you can “Create a new menu” or “Import an existing menu from Shopify”.
For demonstration purposes, here we will import the menu we created earlier, which is “Main menu”.
Preview your menu before pushing it to your storefront. Once satisfied, hit Continue to confirm your settings for the menu.
Step 8: Save and Connect to Theme
After completing the menu changes, hit the Save button at the top right of the window. This will open a pop-up to select the theme where you want to display the menu.
For this demonstration, we have selected the current live theme (Dawn).
After selecting the theme, you need to enable the app. Click the Enable App button.
In the theme editor, enable the app.
Step 9: Preview the Mega Menu on Your Store
At last, preview the changes.
Now, on the front of your store, check the changes that are applied with the Shopify app.
Here are some key benefits of the Meteor Mega Menu:
Beautiful responsive templates
Product/collection images directly in the menu
Uses native Shopify menus (easy integration)
Mobile & desktop support
Multi-region and currency support
How to Add a Mega Menu Using Custom Code in Shopify?
If you’re comfortable working with code or have a developer on your team, building a custom Mega menu gives you the most control over design and functionality. This approach is best suited for advanced users who want something completely tailored to their store’s needs, beyond what themes or apps can offer.
In this method, you’ll typically work with Liquid (Shopify’s templating language), HTML, CSS, and a bit of JavaScript. Here’s a high-level look at what the process involves:
What the Custom Code Approach Involves:
Editing theme files: Work inside the header.liquid, theme.liquid, or dedicated navigation sections.
Menu data structure: Pull and loop through Shopify navigation items using link lists or menu links.
HTML/CSS layout: Manually build the structure of your dropdown or Mega menu with nested divs and grid layouts.
JavaScript behaviors: Add interactivity such as hover or click dropdowns, animations, and mobile responsiveness.
Image and product integration: Dynamically insert product or collection images using Liquid and Shopify metafields if needed.
This route is highly customizable but does require comfort with front-end development and the Liquid language. For merchants unfamiliar with code, it’s best to hire a Shopify expert to ensure everything works smoothly.
Whether you’re aiming for a completely unique design or need advanced behavior that apps can’t offer, the custom coding method opens up endless possibilities as long as you’ve got the skills (or support) to back it.
Top Mega Menu Apps for Shopify
If Meteor isn’t the perfect fit for you, here are other highly-rated apps that offer powerful Mega menu capabilities:
Create stunning Mega menus with no design or coding skills. Buddha offers ready-to-use templates and extra visual features to enhance navigation and store appeal.
Key Features:
4 submenu styles: Tree, Simple, Tabbed, Contact
Add images, countdown timers, badges, icons, and videos
Multi-language support with one-click translation
Link to any product, collection, or custom page
Let customers navigate or even add to the cart directly from the menu
A full-featured menu builder ideal for stores with extensive collections or content needs.
Key Features:
Dropdowns, tabs, links, lists, and featured content blocks
Add HTML blocks, new products, blog posts, and more
Support for forms, search boxes, and theme-matching fonts
Mobile-friendly and fully responsive
Highlight items using “HOT” or “NEW” badges
Each of these apps is designed to simplify menu management while offering powerful customization and user experience improvements. Whether you want a minimalist dropdown or a dynamic promotional menu, these tools give you everything you need to create an engaging storefront.
Tips and Testing: Making Your Mega Menu Work Beautifully
Building a mega menu isn’t just about listing links; it’s about creating a clean, intuitive navigation experience.
Once your structure is ready, polishing the design and testing it properly can have a big impact on how users engage with your store.
Here are some practical tips and essential checks to make sure your Mega menu works beautifully across devices.
Tips for an Effective Mega Menu Design:
Keep it clean and scannable: Avoid overloading the menu. Group related links together and use clear headings to guide your visitors.
Use visuals wisely: Add product images or icons to highlight important sections, but make sure they don’t clutter the layout.
Highlight key promotions: Use badges like “New” or “Sale” to bring attention to special collections or featured items.
Be mobile-friendly: Choose a layout that adjusts well on phones and tablets, and test the tap experience.
Limit the depth: Stick to 2–3 levels of submenus at most. Too many nested layers can confuse users.
Use consistent styling: Match the font, colors, and spacing with your theme to make the menu feel native to your site.
How to Test Your Mega Menu:
Check on different devices: Preview your menu on desktop, tablet, and mobile to ensure it behaves properly across screen sizes.
Test all links: Make sure every menu item leads to the correct destination, whether it’s a product, collection, or page.
Verify hover and click actions: Confirm that dropdowns open smoothly and don’t disappear too quickly.
Scan for broken visuals: Ensure all images, icons, and badges are loading correctly, especially on slower connections.
Ask for feedback: Share your new menu with team members or early customers and gather impressions on usability.
A well-designed Mega menu can make browsing your store feel effortless. Taking the time to fine-tune the design and thoroughly test the experience ensures your visitors can find what they’re looking for–quickly and confidently.
FAQs on How to Create a Mega Menu in Shopify
What is a Mega menu in Shopify?
A Mega menu in Shopify is an expanded navigation menu that displays multiple categories, subcategories, images, and links in a wide panel. It helps users explore large product catalogs quickly without clicking through multiple pages.
What is the difference between a dropdown menu and a Mega menu?
A dropdown menu shows a basic list of sub-items under a main menu item, usually in a single column. A Mega menu, on the other hand, expands into a multi-column layout with structured sections, images, and even product links — ideal for large inventories.
What are the benefits of a Mega menu?
Mega menus improve navigation, reduce clicks, and help customers discover more products faster. They also let you promote collections, showcase visuals, and organize content in a cleaner, more scannable layout — especially useful for stores with many categories.
How to add a Mega menu in Shopify without any app?
You can create a Mega menu in Shopify by nesting menu items under a main header in your Navigation settings. Then, use your theme’s customizer (if supported) to change the menu type to “Mega menu” — no coding or app needed.
How do I create a custom menu in Shopify?
Go to Online Store → Navigation → Menus in your Shopify admin. Create a new menu or edit an existing one. Add items, set their links, and organize submenus by dragging items under main headers. Then save it to apply to your storefront.
Summary
Creating a Mega menu in Shopify is a simple yet powerful way to organize your store’s navigation. Whether you go with the built-in menu system or use an app like Meteor, a well-designed Mega menu improves user experience and helps customers find products faster.
Just building the menu isn’t enough — take time to test it, fine-tune the layout, and make sure it works smoothly on all devices. Clean design, proper grouping, and smart visuals can go a long way in making your menu both functional and attractive.
If you’re looking for professional help to build advanced menus or optimize your store’s UX, connect with our experts to get it done right.
Ankur Shah is a tech-savvy expert specializing in eCommerce solutions. With a deep understanding of WooCommerce and Shopify, he helps businesses optimize their online stores for success. Whether it's implementing new features or troubleshooting issues, Ankur is your go-to guy for all things eCommerce.