If you’re working on a Shopify store and want to save time while keeping your code clean, snippets are the best solution. These small reusable codes help you avoid repeating the same elements on multiple pages.
From displaying a product badge to adding custom messages, snippets make your store more flexible and easier to manage. But if you’re new to them, adding and reusing snippets might seem confusing at first.
Don’t worry, whether you’re managing your store yourself or working with experts, this guide will break down how to add snippets in Shopify simply. So, let’s get started!
How to Add Snippets in Shopify Using Snippet Files?
When working with Shopify themes, using snippet files is one of the cleanest and most efficient ways to reuse code. It helps keep your templates organized and makes updates much easier down the road.
Whether you’re adding a promo banner, a custom label, or a reusable block of HTML, snippets allow you to include that same content across multiple pages without repeating code manually. Follow these steps to add Shopify Liquid snippets in your theme using a Liquid file:
You can customize the HTML and use Liquid placeholders to make it dynamic.
Step 2: Include the Snippet Using the Render Tag
To display your snippet in a theme file (like product.liquid/main-product.liquid, collection.liquid, or index.liquid), use the render tag:
As an explanatory process, here we will add this to the main-product.liquid on the top of the file code.
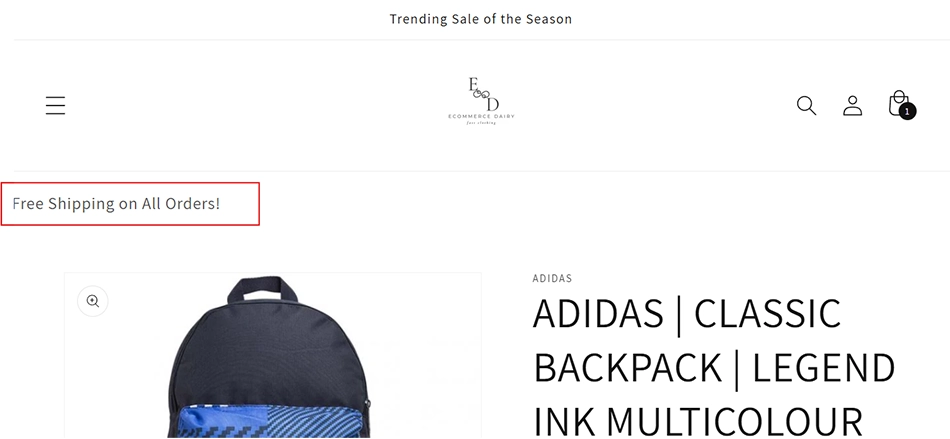
{% render 'promo-banner', message: 'Free Shipping on All Orders!' %}
Here’s What Makes Render Special:
It passes only the variables you specify, keeping things clean.
It creates a separate scope, preventing conflicts with variables in your main template.
It is the recommended method by Shopify (unlike the older include tag, which is now deprecated).
Last but not least, we will check the website product page to see that the banner is properly rendered.
Pro Tip:
Keep your snippets focused, and avoid packing them with too much logic. If a snippet is doing too many things, consider breaking it into smaller pieces for easier maintenance.
Using snippet files is a smart way to build scalable Shopify themes. Once you get comfortable with this approach, you’ll find it easier to make changes and reuse components without touching every single template.
If you want to add new functionalities in your eStore with custom code, consult with our Shopify development agency. Our experts will design the code in a way that complements your website.
Transform Your Shopify Store’s Functionality Today!
How to Add Snippets in Shopify Using Page Builder Apps?
Not everyone is comfortable working with code, and the good news is – you don’t have to be. With tools like Shogun, you can build and manage pages visually while still enjoying the flexibility of reusable content blocks.
Snippets in page builder apps are essentially reusable content blocks. You can design a section once, save it as a snippet, and drop it into other pages whenever needed. This is especially useful for repeating banners, promotional blocks, testimonials, or custom call-to-action. Here’s a complete breakdown of how to add and reuse snippets in Shopify using Shogun.
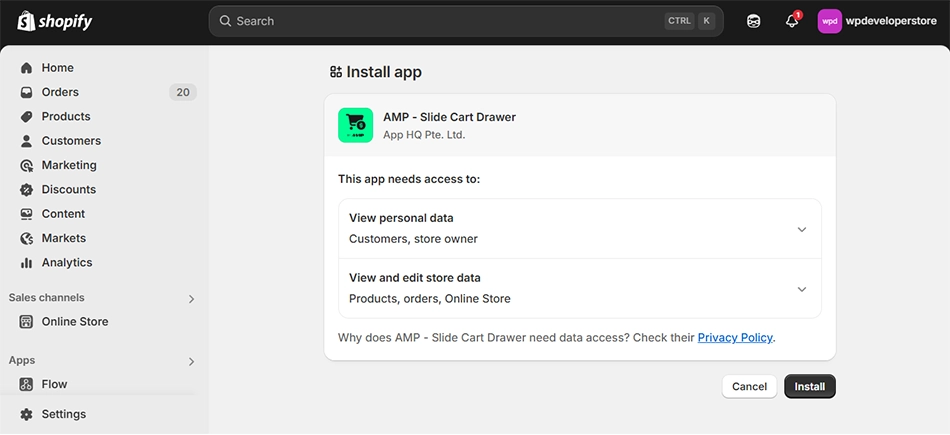
Step 1: Open the Shogun App from Your Shopify Admin
Log in to your Shopify admin panel. Click on Apps, and then launch Shogun. This will open the main Shogun dashboard, where you can start managing or creating pages.
Step 2: Browse Page Templates
In the dashboard, hover over the “Build or Edit a Page” option. From the available dropdown, select “Browse Templates”.
You’ll now see a variety of pre-built page templates that suit different use cases, like landing pages, product pages, or promotional layouts.
Step 3: Choose a Template
Find a template that fits your design goal. Hover over the one you like, then click on “Choose Template” to proceed.
Using templates is a great way to speed up the design process, especially if you’re working on a tight deadline.
Step 4: Create a New Page from the Template
On the next screen “Create New Page from Scratch,” choose your desired page type. This gives you a base layout where you can add or edit content freely using Shogun’s drag-and-drop builder.
Step 5: Click “Create New Page”
Clicking this will load the editor with the selected template. Give your page a relevant title to keep things organized inside your Shogun workspace.
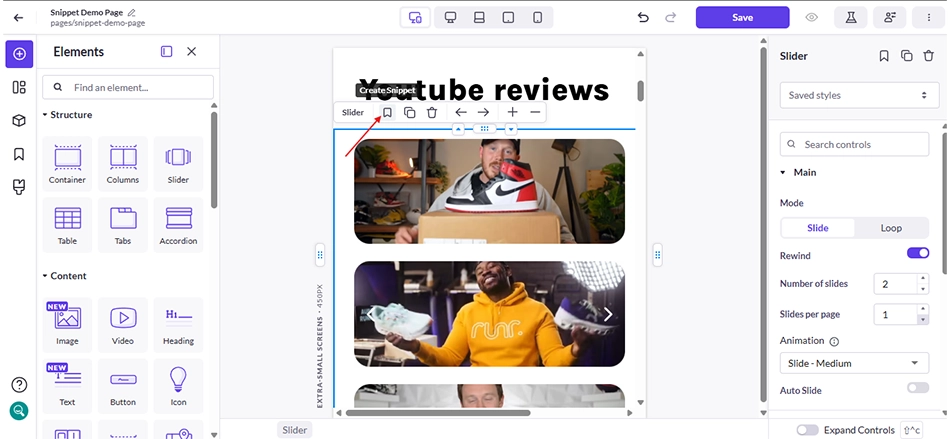
Step 6: Select the Section to Save as a Snippet
Once the editor loads, browse through the content blocks. Find the section you want to reuse like a feature box, testimonial carousel, or newsletter sign-up area. Hover over it and click the Bookmark icon (this is the “Create Snippet” button).
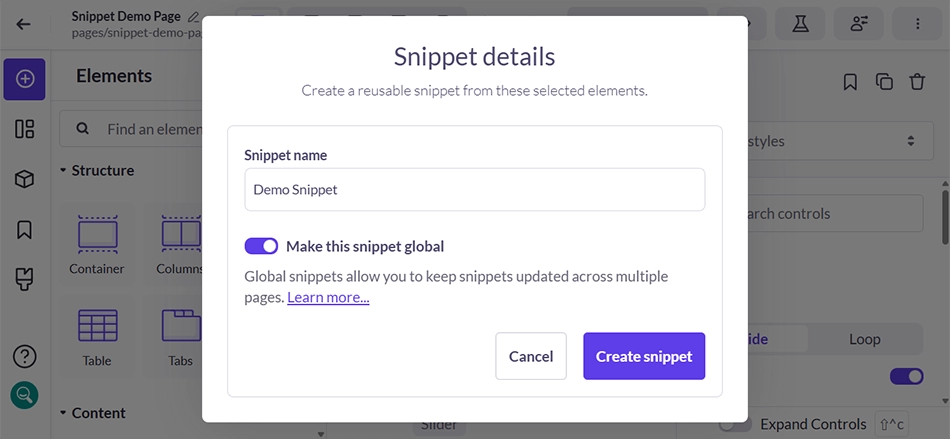
Step 7: Fill Out Snippet Details
A pop-up form will appear where you’ll need to:
Enter a name for your snippet.
Enable “Make this snippet global” – this is a powerful feature that allows you to update this snippet across multiple pages at once, saving time and effort.
Step 8: Save Your Snippet
Click on Create Snippet, and you’re done. The snippet is now stored and ready to be reused wherever needed across your store.
Reusing Your Snippet on Other Pages
Once your snippet is saved, you can easily add it to any other page built with Shogun:
Launch the Shogun app and open the page where you want to insert the snippet.
On the left-hand sidebar, navigate to the Snippets section. This section stores all the custom snippets you’ve created previously.
Find the one you need, drag it into your desired location in the layout, and release.
Click Save, then Publish.
Visit the live page to verify that your snippet is rendering correctly.
With Shogun, you can leverage a modular design without the coding hassles. It’s perfect for anyone who wants to speed up their workflow and keep content consistent across the store – all while staying completely in control.
Shopify Snippets vs. Shopify Sections
While working with Shopify themes, you’re likely to encounter both snippets and sections. Though they share some similarities, they serve different purposes.
Both Shopify snippets and Shopify sections are reusable building blocks that help structure your store’s pages. For instance, a typical product page might include sections for the header, product details, reviews, and footer. These are modular and can be customized to fit your design. The main difference comes down to complexity and scope.
Snippets are best for small, repeatable elements like a sale badge, trust seal, or shipping message.
Sections are suited for larger components that may contain multiple elements and more complex logic, such as an entire product form or a homepage feature grid.
Another key difference is in file types:
Snippets only use .liquid files.
Sections can use .liquid or .json, especially with Online Store 2.0, which supports JSON templates for better flexibility.
Understanding when to use a snippet versus a section helps you build more efficient, organized, and scalable Shopify themes. And whether you want new sections or snippets on your store, hire dedicated Shopify developers.
Best Practices for Using Snippets in Shopify Store
Snippets are super helpful for keeping your Shopify theme modular and clean. But to really make the most of them, you need to follow some smart habits.
These best practices will help you write code that’s easier to manage, update, and scale, especially useful as your store grows or if more people join your team.
Use Clear, Descriptive Names
Don’t name your snippets something like box.liquid, or thing.liquid. Instead, use names that tell you exactly what the snippet is about.
For example:
product-badge.liquid
newsletter-form.liquid
featured-collection-grid.liquid
This makes your theme files easy to navigate, especially when you come back to them weeks later or when someone else is trying to understand the structure. Think of it as naming folders or files on your desktop. The clearer the name, the less guessing later.
Keep Snippets Focused and Single-Purpose
Each snippet should do only one thing. If you’re using a Shopify render snippet in multiple sections or handling lots of logic, it’s time to break it into smaller parts.
For example, if a snippet handles both product badges and stock messages, split them:
product-badge.liquid
low-stock-warning.liquid
This helps with debugging and updating later on. Smaller snippets are easier to read, easier to fix, and less likely to cause problems.
Reuse Where It Makes Sense
The main reason for using snippets is to avoid duplicating code across multiple places. If you catch yourself copying and pasting the same block of Liquid code into several files, it’s time to turn it into a snippet.
Let’s say you’ve got a custom product label or a trust badge. Instead of rewriting it on every product page, make it a snippet and reuse it everywhere. It’ll save you time and reduce the chances of errors or inconsistencies.
Use the Render Tag Instead of Include
Shopify now recommends using {% render %} instead of {% include %} to insert snippets, since render gives each snippet its own isolated scope.
That means variables won’t accidentally clash with other parts of your theme. Here’s an example of proper usage:
This keeps your snippets lightweight and easier to manage. Less data passed = less confusion later.
Add Comments When Needed
If your snippet includes multiple dynamic elements or logic, drop in a few comments to explain what’s going on. For example:
{% comment %}

  This block renders a badge if the product is tagged as "Best Seller"

{% endcomment %}
Comments are especially helpful when:
You return to the file months later
Someone else on your team needs to understand your work
You’re troubleshooting something that stopped working
They don’t show up on the front end, but they save a lot of time on the backend.
FAQs on Adding Snippets in Shopify
Q1. What are Shopify snippets?
Snippets are small pieces of reusable Liquid code used to simplify your theme structure. They help avoid repeating the same code across multiple files, keeping your theme clean and modular.
Q2. How do I add an event snippet in Shopify?
To add an event snippet (like a tracking or conversion snippet), go to your Shopify admin > Online Store > Themes > Edit Code
Open the appropriate file (like theme.liquid or checkout.liquid) and paste the event snippet where needed, usually before the closing
/head/em or /body/em tag.
Q3. How to render a section in a snippet on Shopify?
Shopify doesn’t allow rendering full sections inside snippets directly. Sections must be rendered in theme files using {% section ‘section-name’ %}. Snippets, however, can be used inside sections or templates using {% render ‘snippet-name’ %}.
Q4. What is the difference between snippets and sections in Shopify?
Sections are larger, standalone components (like headers, footers, or product pages) with optional settings and drag-and-drop support. Snippets are smaller code blocks for specific tasks (like a star rating or a product badge) and can’t be used independently.
Q5. How do I add a snippet on Shopify?
Go to Online Store > Themes > Edit Code.
Under the “Snippets” folder, click “Add a new snippet”, give it a name, and click Create. Add your code inside the file. Then use {% render ‘snippet-name’ %} wherever you want to display it.
Let’s Conclude
Snippets might seem like a small part of Shopify, but they can make a big difference in how your store runs behind the scenes. They help keep your code clean, reusable, and easier to manage, especially as your store grows.
Whether you’re adding them through the code editor or using page builder apps like Shogun, snippets give you the flexibility to build faster and smarter. And with just a few best practices, you can keep everything organized without the mess.
If you’re ever stuck or want a smoother setup, our Shopify development experts can help you. They’ll help you structure your theme right from the start. Let’s have a consultation today!