Managing orders in one system, inventory in another, and customer data somewhere else? That’s where most Magento stores start struggling to scale.
Magento integration solves this issue by connecting your store to essential business systems such as ERP, CRM, and analytics tools. This integration ensures that everything works in sync.
In this Magento integration guide, we will explore different integration methods, the right approach, use cases, benefits, and challenges.
What is Magento Integration?
Magento integration is the process of connecting your Magento store to external systems, such as ERP, CRM, payment gateways, and analytics tools, to automate workflows and synchronize data.
Here are some of the top benefits of Magento integration:
Improved Operational Efficiency: Integrating your Magento store with different tools (such as ERP and inventory management systems) will automate manual tasks, eliminate errors, and save time.
Enhanced Customer Experience: Connecting a CRM will offer you a 360-degree view of customer behavior. So, you can ensure a personalized user experience for every customer.
Streamlined Payments: Magento supports integration with multiple payment gateways and offers secure checkout.
Advanced Analytics: Linking analytics tools will offer detailed insights into sales trends and marketing ROI.
Popular Integrations with Magento
There are numerous integrations available for connecting to Magento. Below are some of the most useful options you should consider:
ERP Systems
Integrating your Magento store with popular ERP systems like NetSuite or SAP will help in inventory management. These systems will enable automatic data synchronization for inventory, orders, and payments.
CRM Tools
Connecting CRM tools like HubSpot and Salesforce will automate customer data management and lead tracking. They will help in refining sales strategies and implementing a personalized customer experience.
Payment Gateways
To offer a secure and engaging checkout experience for customers, consider integrating payment gateways such as PayPal and Stripe. They support multiple payment methods and use fraud-prevention tools, so you can ensure smooth, compliant transactions.
Accounting Software
Accounting tools like QuickBooks and Xero can automate tasks related to invoice management and tax calculations. This way, you can simplify financial operations and comply with local tax regulations.
Data Analytics
Linking data analytics tools like Google Analytics and Hotjar will help in understanding customer behavior and the user journey. So, you can adapt marketing efforts and improve ROI by utilizing data-driven strategies.
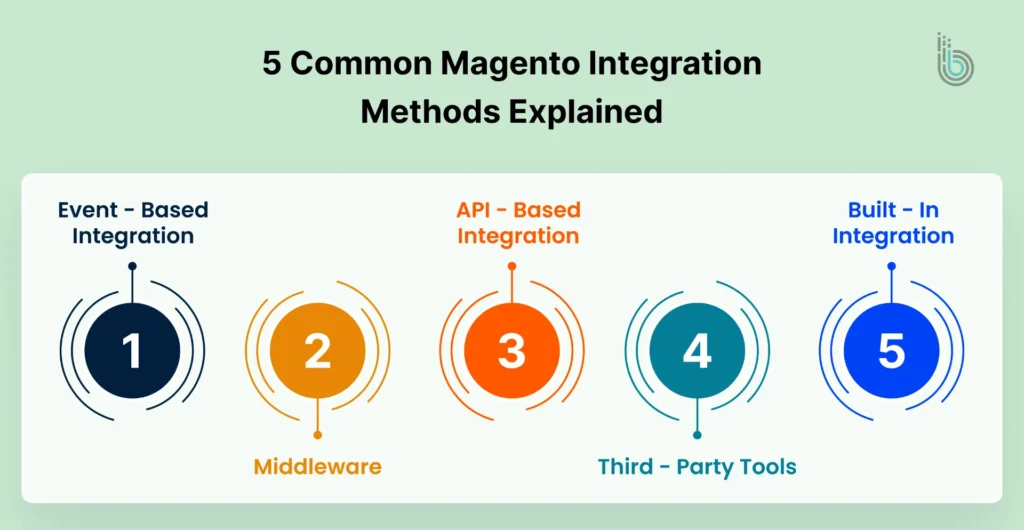
5 Common Magento Integration Methods Explained
There are various Magento integration methods for seamlessly connecting third-party tools to your store. The right method will depend on your store’s structure and business needs. Let’s explore the top five commonly used methods:
Method 1: Built-In Integrations
Magento offers many built-in integrations to manage payments, shipping, and tax. These tools can be integrated with the standard capabilities without editing the codebase. Here are some top built-in integrations available in different categories:
Payments: PayPal, Braintree, and Authorize.Net
Shipping: UPS, USPS, and FedEx
Tax: Avalara and Vertex
Here’s how to integrate:
Step 1: Go to the Settings section in the Magento dashboard. Then navigate to Stores > Configuration.
Step 2: Now, configure the integrations. Here’s how to do it:
Payment Gateways: Go to Stores > Configuration > Sales > Payment Methods. Select a payment gateway, add the API credentials, and account details.
Shipping: Go to Stores > Configuration > Sales > Shipping Methods. Choose your preferred carrier and enter details like shipping address, rates, and delivery regions.
Tax: Go to Stores > Configuration > Sales > Tax. Configure tax classes and define tax calculation methods.
Step 3: Run different tests to ensure everything is running correctly. Place a sample order and check if the workflow needs improvements.
Step 4: Check system logs to see if the API connection is working well. After that, clear the cache and reindex the website using the Fluch Magento Cache feature.
Method 2: Third-Party Tools and Custom Modules
You can install third-party tools from the Adobe Commerce Marketplace or deploy custom modules within the framework. A Magento integration services provider can help you choose and leverage the right option for your store’s needs.
Third-party extensions will come with connectors, eliminating the need for custom development. Here are some third-party extensions:
Webkul Odoo Connector: Helps in setting up two-way sync between Magento and Odoo for products and orders.
Boostmyshop ERP: Ensure built-in ERP features are directly in the Magento store.
QuickBooks: Sync data (orders, customers, and invoices) between Magento 2 and QuickBooks.
Custom modules are useful when available integration options cannot meet your requirements. They can be connected with events and used to override plugins or built-in Magento features.
If you want to implement loyalty programs, apply complex discount logic, or prepare a custom checkout flow, third-party tools and custom modules can be useful.
Here’s how to integrate:
Step 1: First, determine what you need – a third-party integration or a custom module. Then, decide on the vendor after comparing prices and offerings.
Step 2: Now, start setting up the integration.
Follow these steps to install a third-party extension:
Install with Compose or upload to the Magento server. Also, check the vendor’s installation tips.
Execute Magento CLI commands such as Upgrade and Deploy to complete the installation.
Configure the settings based on your needs.
Follow these steps to install a custom module:
Set a proper module structure
Define and implement logic with Magento’s dependency injection system
Implement custom API endpoints
Deploy on the staging environment
Step 3: Begin testing the integration. Ensure everything is running smoothly by putting up sample orders.
If you have applied cron jobs and event triggers, check them as well.
Step 4: Now, secure the integration and monitor its performance. For example, if the integration needs to review product data, then grant read-only access to product endpoints and disable customer data access.
Here are some other tips to keep in mind:
Keep changing the API keys and tokens regularly. It will eliminate the risk of unauthorized access.
Enable alerts for failed cron jobs and API errors to identify issues on time.
Check logs regularly.
Step 5: After running different test cases on staging, move the changes to the live site. Once done, ensure proper data mapping, sync logic, and cron jobs.
Note all the configurations made and keep a rollback plan in backup in case the integration fails. Keep monitoring the integration and update the connector after every major system upgrade.
Method 3: API-Based Integration
You can use Magento’s built-in web APIs to allow direct data exchange between the store and external tools. Magento supports two types of APIs:
REST: REST APIs are widely used for modern web and cloud integrations. They use standard HTTP methods (GET, POST, PUT, DELETE) and typically exchange data in lightweight formats like JSON. REST is flexible, scalable, and well-suited for real-time integrations and modern applications.
SOAP: SOAP APIs are protocol-based and commonly used in enterprise and legacy systems. They rely on XML for data exchange and follow strict standards for security and message structure. SOAP is ideal for applications that require high security, formal contracts, and reliable transactions.
Here’s how to integrate:
Step 1: Create a list of data objects such as products, orders, customers, etc. Also, determine the synchronization frequency (scheduled, real-time, on-demand).
Step 2: Select a suitable API type.
Step 3: Now, add the new integration via System > Extensions > Integrations, click Add New Integration. Enter details such as name, email, and other relevant information.
In the API section, enter data points to give access. Activate the integration to generate the necessary authentication credentials, such as Access Token for REST, Consumer Key, or Token Key for SOAP.
Step 4: Use a popular API client (such as Postman) to send API requests to the system and validate connectivity. You can even build a custom API client.
For the REST API, make a request for the endpoint and add the access token in the request header.
For SOAP API, create a WSDL URL and authenticate it with your Consumer and Token keys.
Step 5: Ensure the system follows Magento’s API specifications and authenticates properly. It should also comply with Magento’s pagination limits and rate-throttling rules.
Step 6: Decide whether to synchronize data in real time or with scheduled updates. For real-time updates, define API calls that get triggered when a specific event occurs. For scheduled updates, apply cron jobs to run synchronization at multiple intervals.
Step 7: In the event of a synchronization failure, there is a risk of data loss. So, implement retry logic for failed requests.
Step 8: Start placing sample orders to test the whole workflow. Review all data points and systems to verify that the data is being mapped correctly.
API-based integrations offer you great control over the process and are often a reliable option for large datasets.
Method 4: Using Middleware
Middleware acts as a bridge between different systems and facilitates data transfer. You can communicate with the middleware through REST/SOAP APIs or file-based sync, based on the system’s capabilities. The middleware method is useful when you need to integrate multiple systems and follow complex workflows.
There are two middleware methods you can consider:
iPaas Platforms: Integration platform as a service (iPaas) platforms are cloud-based tools that connect Magento with other systems. They use pre-built connectors, visual workflow builders, and scheduling tools. They handle everything from data transfer to routing and error handling. To work on Magento, they might need some configuration.
Custom Microservices: Microservices are an architectural approach where an application is made of different independent components or services. This method breaks the functionality into different, manageable components. So, each component will correspond to a specific task such as user management, payment processing, etc.
Here’s how to integrate:
Step 1: Before beginning the process, define your business and technical needs clearly. Decide which data types to sync, the synchronization frequency, and any custom rules.
Step 2: Choose a suitable middleware type. Choose iPass when you have a limited dataset and a dedicated team to manage the integration. Go for a custom middleware when the dataset is large and there are complex use cases.
Step 3: Now, start setting up the middleware. Here’s how to set up iPaas:
Based on your system’s API capabilities, choose a REST or SOAP connector.
Use the drag and drop interface to match Magento’s data fields with the other system’s fields.
Now create and apply custom rules for data synchronization.
You can even set a synchronization frequency. Use scheduled jobs at multiple intervals or real-time synchronization with webhooks.
Step 4: To integrate the middleware in the Magento store, you must set up API access. Go to System > Extensions > Integrations and add a new integration user. Allow access to required data, such as Products and Customers.
Then, generate the Access Token for REST or OAuth credentials for SOAP. These credentials are important to develop and test API connectors.
Step 5: It’s time to implement API connectors that establish communication between Magento and external tools. Here’s how to do it:
From the source system’s API, request the required data.
Define data formats and match field names so they can match with the targeted system’s fields.
Find and include additional attributes that need to be added in the target system.
Begin transferring the data via the API or by exporting it as XML.
Execute the integration flow in a sandbox environment and check for errors.
Step 6: Set up alerts for failed synchronization attempts, API timeouts, or data mapping issues. Also, use monitoring tools to identify app errors and track request volume and latency.
Step 7: Move the integration workflow to the live website. Start triggering the events like placing orders, updating inventory, and adding new products. Then, verify that the data is being updated in the integrated tool properly.
Try different scenarios to ensure smooth and accurate data transfers. Check if /health endpoints are active and logs are up-to-date with the current status.
Method 5: Event-Based Integration
Event-based integrations get triggered automatically when an event takes place. Whenever an event occurs, the data will be pushed to the connected systems. So, there is no need for manual syncing.
Magento mainly supports two mechanisms:
Webhooks: It transfers event details instantly to the target system over HTTP.
Message Queue Framework: It pushes event payloads to RabbitMQ, so applications can communicate asynchronously.
Here’s how to integrate:
Step 1: Event-based integrations are supported only in Adobe Commerce, not Magento Open Source. So, make sure you upgrade your store.
Step 2: Now, choose the ideal integration method. Webhooks work best if the external system can receive and process HTTP POST requests in real time. The Message Queue Framework is suitable if you want guaranteed delivery and batch processing, especially with high event volumes.
Step 3: Now that you have chosen your method, it is time to build the connection. Follow these steps based on your selected approach.
Webhook-based Integration
Decide which Magento actions should tell your other system to start working. Common examples include:
sales_order_place_after: Triggers when a customer finishes an order.
customer_register_success: Triggers when a new account is created.
catalog_product_save_after: Triggers when product information is updated.
You will need to write a small piece of code (an observer) that “listens” for these events. When the event occurs, this code gathers key details, such as the Order ID or customer email, bundles them into a JSON file.
Your module will use an HTTP POST request to send that bundle to your external system’s web address.
Use an API token or a digital signature (HMAC) to ensure only your authorized systems can communicate.
Record every request so you can track if something goes wrong. If the other system is busy or offline, set up a “retry” rule so Magento automatically retries sending the data later.
Message Queue-Based Integration:
Install RabbitMQ and connect Magento by updating your env.php file. In your module, define a “topic” (a label for the data) and a “queue” (the waiting line for the data). This guides Magento on where to send information.
Write a publisher class that takes the event data and pushes it onto the queue.
Step 4: Develop a consumer class in your module that listens to the queue you defined earlier. This consumer will then take the received data and send it to the target system, such as an ERP, CRM, or external API.
Once the consumer is ready, register it in your module’s configuration and run it through Magento’s queue system. This will automatically process the messages as they are published.
Step 5: Create test orders or manually trigger events in Magento to send messages to the queue. Check RabbitMQ’s management interface or use the command line to confirm that the messages are being added to the queue properly.
Also, make sure the consumer is running and processing messages correctly by verifying that the target system, such as your ERP or CRM, is receiving the correct data. Test error handling by introducing issues like invalid endpoints or network problems. This helps confirm that retry mechanisms and error handling are working as expected.
Finally, try sending a large number of events to the queue to see how the system handles high volume and to ensure stability.
Choosing the Right Integration Approach
Selecting the right Magento integration method depends on your business requirements, technical needs, and the level of control you want. To make an informed decision, consider the following factors when choosing.
Factor
Native Magento Features
Third-Party Extensions
Custom Development
Flexibility
Limited flexibility, ideal for straightforward needs like basic payment or shipping integrations
Moderate flexibility, suitable for specific use cases such as ERP or CRM connectors
High flexibility for unique business requirements or highly specialized workflows
Development Time
Quick to implement, no coding required
Moderate; depends on extension availability and configuration complexity
Long; requires careful planning, coding, and testing
Cost
Generally lower cost, as most features are built-in
Variable; can be cost-effective depending on the extension vendor
Higher cost due to bespoke development and resource investment
Scalability
Suitable for small to medium-sized stores
Good scalability for broader needs with some limitations based on the extension
Highly scalable for complex and enterprise-level integrations
Customization
Limited; only standard configurations available
Some customization possible through extension settings
Extensive; every feature and workflow can be tailored to your business
Control
Minimal; tied to built-in Magento behavior
Moderate; depends on extension features
Full control over features, data flow, and functionality
Here are some important things to consider:
Business Goals: Identify the core objectives of the integration. For example, if you only need payment or shipping management, native features may suffice. For ERP, CRM, or advanced analytics, a third-party or custom solution is more appropriate.
Technical Resources: Assess your team’s capabilities. Custom development requires developers familiar with Magento’s architecture, while extensions often need less technical effort.
Budget: Consider not only initial costs but long-term maintenance. Native features are typically low-cost, extensions vary, and custom development usually demands a higher investment.
Scalability & Growth: Ensure the chosen approach can scale with your business. Custom solutions provide maximum scalability, while native integrations may limit expansion.
Time to Market: Native features are quick to deploy, while custom development can take longer.
Benefits of Magento Integration
Integrating Magento with other systems can transform the way your eCommerce business operates. It helps streamline processes, improve customer experience, and support business growth. Here are the key benefits of Magento integration:
Enhanced Functionality
By connecting Magento with tools such as ERP or CRM systems, you can automate everyday tasks, manage data efficiently, and provide a personalized experience for your customers. This streamlines business processes and helps your team focus on high-value work rather than repetitive manual tasks.
Improved Efficiency
Integration reduces manual data entry and ensures information flows seamlessly between systems. This saves time, reduces errors, and boosts productivity. For instance, linking Magento to an inventory management system ensures accurate stock levels and prevents overselling or unexpected stockouts.
Seamless Customer Experience
Connecting Magento with CRM platforms centralizes customer information, giving you a unified view of each customer’s journey. This allows you to personalize marketing campaigns, offer targeted promotions, and provide a consistent, smooth shopping experience across all channels.
Expanded Reach
Magento integrations with marketplaces allow you to sell on multiple platforms directly from your store. This helps you reach more customers, increase product visibility, and drive sales growth without manually managing separate systems.
Real-Time Data Synchronization
Integration ensures that data is updated in real time across all connected systems. This keeps your information accurate, eliminates inconsistencies, and allows you to make better decisions based on up-to-date data.
Scalability
Magento’s flexible architecture and integration capabilities make it easy to grow your business. Whether adding new products, entering new markets, or connecting with additional systems, integration supports your expansion plans without creating bottlenecks.
Cost Savings
Automation reduces manual labor, minimizes errors, and eliminates duplicate work. Over time, this lowers operational costs, improves resource management, and allows your team to focus on initiatives that drive revenue and growth.
Real-World Magento Integration Use Cases
Many businesses have leveraged Magento integrations to streamline operations, improve customer experiences, and drive growth. Here are some notable examples:
Nestlé Nespresso
Nespresso wanted to elevate its eCommerce platform to deliver a consistent, seamless shopping experience for customers across multiple regions.
Goal: Provide a seamless eCommerce experience across multiple regions.
Integration Approach: Connected Magento with SAP for inventory and order management, and Salesforce for customer relationship management.
Results:
Consistent user experience globally
Increased operational efficiency
Enhanced customer satisfaction
Nike
Nike aimed to simplify its eCommerce operations while offering a personalized shopping experience that meets the expectations of customers around the world.
Goal: Streamline eCommerce operations and deliver personalized customer engagement.
Integration Approach: Integrated Magento with various ERP systems to manage inventory and customized CRM solutions for targeted marketing.
Results:
Flexible management of global operations
Improved conversion rates
Stronger customer relationships
Ford
Ford wanted to create a user-friendly online platform where customers could explore vehicle options and make purchases easily, while keeping backend systems in sync.
Goal: Offer an intuitive platform for exploring and purchasing vehicles online.
Integration Approach: Implemented Magento with custom integrations to connect the online storefront with backend systems for smooth data management.
Results:
Enhanced customer interaction
Increased online sales
Strengthened brand presence
Challenges in Magento Integration & How to Overcome Them
Integrating Magento with other systems can be highly beneficial, but it also comes with some challenges. Understanding these challenges and knowing how to address them will ensure your integration is smooth and reliable.
1. Data Inconsistencies & Syncing Delays
When connecting multiple systems, data may not always sync immediately, leading to inconsistencies across platforms.
How to Overcome:
Use message queues like RabbitMQ or Kafka to manage data flow.
Ensure asynchronous processing, so updates happen in the right order.
Monitor synchronization regularly to detect and resolve issues quickly.
2. API Rate Limits & Throttling
High-volume data exchanges can hit API limits, slowing processes or causing request failures.
How to Overcome:
Batch API requests instead of sending data point-by-point.
Use efficient querying to reduce unnecessary API calls.
Implement caching to store frequently used data and reduce repeated API hits.
3. Security & Compliance Risks
Sharing sensitive customer and business data between systems increases the risk of breaches and non-compliance.
How to Overcome:
Use OAuth 2.0 for secure authentication.
Comply with data protection regulations, such as the GDPR, by anonymizing data where necessary.
Establish clear consent processes for collecting and sharing customer information.
4. Handling Large Datasets
Managing large volumes of products, orders, or customer records can slow down performance and create bottlenecks.
How to Overcome:
Optimize database indexing to speed up queries.
Use asynchronous processing to handle heavy tasks in the background.
Monitor performance metrics to identify areas needing improvement.
Final Thoughts
Magento integration can improve how your eCommerce store works. It can help you manage data, automate processes, and provide a better experience for your customers. By connecting Magento with third-party tools, you can save time, reduce errors, and make smarter decisions.
Choosing the right integration approach and addressing common challenges ensures your store runs smoothly and efficiently. With careful planning and the right tools, Magento integration can support growth, improve operations, and help your business stay competitive in a fast-changing online market.
FAQs
Q1. What is Magento integration?
Magento integration connects your Magento store with external systems like payment gateways, marketing tools, or inventory software. It helps automate processes, improves data accuracy, and creates a smoother shopping experience for your customers.
Q2. Why is Magento eCommerce Integration important for a business?
Magento integration is important because it streamlines operations, reduces manual work, and ensures that your data is always accurate and up-to-date. It also enhances the customer experience, helping boost sales and satisfaction.
Q3. Can I integrate Magento 2 with ERP and CRM tools?
Yes, Magento 2 can be integrated with ERP and CRM systems to sync orders, inventory, and customer data. This reduces errors, improves efficiency, and gives valuable insights for smarter business decisions.
Q4. What is Magento third-party API integration?
Magento third-party API integration connects your store to external services using APIs. This allows smooth data exchange and extends the capabilities of your Magento store.