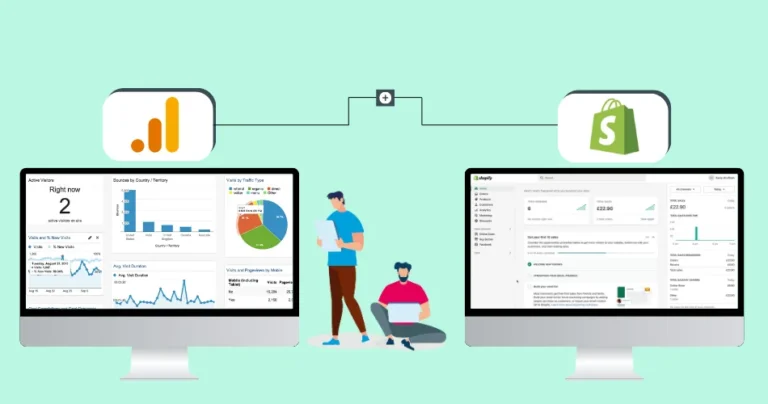
Are you running a Shopify store? You may need to understand your customers, learn where they come from, and track which products are driving sales. With these insights, you can make better-informed decisions about advertising, branding, and marketing to boost your sales. Website owners can identify potential areas for improvement and implement changes throughout the user journey. This is where Google Analytics for Shopify comes in. Google Analytics provides essential data to help you optimize your store and increase revenue.
Why Use Google Analytics with Shopify?
Google Analytics is an essential tool for Shopify store owners looking to optimize their business with actionable insights. It provides comprehensive data, including:
- Enhanced Ecommerce Tracking: Access detailed information on sales, revenue, shopping behavior, and funnels. Track actions such as cart additions, checkouts, and orders in depth.
- Audience Reports: Gain a better understanding of your audiences.
- Deeper Customer Insights: Learn about your customers’ preferences based on their interactions with your Shopify store.
- Improved Marketing Effectiveness: Evaluate the performance of your traffic sources and marketing campaigns to optimize your spending.
- Boosted Conversion Rates: Identify areas for improvement on your site, such as pages with high bounce rates or cart abandonment, and make data-driven changes to increase conversions.
Integrating Google Analytics with Shopify creates a centralized system for tracking your store’s performance, enabling you to make data-driven decisions and effectively enhance your eCommerce marketing strategies.
How to Set Up Shopify Google Analytics?
Let’s look at how you can effectively set up Google Analytics on your Shopify store and get valuable information for more data-driven decisions.
Create a Google Analytics Account
Before you can track anything, you need a home for your data. So first off, you need to create a Google Analytics account.
Step 1: Go to Google Analytics.
Step 2: Sign in with your Google account or create a new one.
Step 3: Click on Start Measuring.
Step 4: Enter your account name, then select the appropriate data-sharing settings.
Step 5: Create a Property by entering your website name, time zone, and currency.
Step 6: Select the platform as Web and enter your Shopify store’s URL.
Step 7: Click Create Stream to generate a Measurement ID.
This will create a new Google Analytics property specifically for your store. Note down your Measurement ID (for GA4) or Tracking ID (for Universal Analytics) as you’ll need this later.
Enable Google Analytics on Shopify
Now that you have your Google Analytics account set up, it’s time to connect it to your Shopify store.
Step 1: Log in to your Shopify admin.
Step 2: Navigate to Online Store > Preferences.
Step 3: Scroll to the Google Analytics section.
Step 4: Paste your Google Analytics Measurement ID into the field labeled Google Analytics Account.
- For older versions, you might need to paste the Universal Analytics Tracking ID (e.g., UA-XXXXXXXXX-X).
Step 5: If you’re using Google Analytics 4 (GA4), you’ll integrate it through Google Tag Manager (explained in Step 4).
Shopify will automatically install the necessary tracking code on your store.
Enable Enhanced Ecommerce Tracking
To enable enhanced eCommerce tracking in Shopify, go to your Shopify admin panel and navigate to ‘Online Store’ > ‘Preferences’.
In the Google Analytics section, ensure your tracking ID is added and then check the box for Use Enhanced eCommerce to activate detailed tracking of product views, cart actions, and checkout behaviors.
Click Save to apply the changes. This feature provides deeper insights into your customers’ shopping journey and sales performance.
Set Up Google Tag Manager (For GA4 Integration)
While you can directly add your GA4 Measurement ID to Shopify, using Google Tag Manager offers greater flexibility and control, especially for advanced tracking.
Step 1: Go to Google Tag Manager.
Step 2: Create an account and a new container for your Shopify store.
Step 3: Install the Google Tag Manager code snippet in your Shopify theme:
- Go to Online Store > Themes > Actions > Edit Code.
- Paste the GTM code in the <head> and <body> sections of your theme’s theme.liquid file.
Step 4: In Google Tag Manager, create a New Tag:
- Choose Tag Configuration > Google Analytics: GA4 Configuration.
- Enter your GA4 Measurement ID.
- Set the Triggering to All Pages.
Step 5: Publish the container in Google Tag Manager.
This method simplifies tag management and allows for easier implementation of other tracking tools in the future.
Verify Google Analytics Setup
To verify your Google Analytics setup, open your Google Analytics account and navigate to the Realtime section. In a separate browser tab, visit your Shopify store and perform actions such as browsing pages or adding items to the cart. Check the Realtime data in Google Analytics to ensure these activities are being tracked accurately.
Enable Conversions Tracking (Optional)
To enable conversion tracking in Google Analytics, go to Admin > Events and create custom events for key actions like purchases, cart additions, and product views. Once created, mark these events as conversions to ensure they are tracked as part of your eCommerce performance analysis.
So you can monitor critical customer interactions and optimize your sales funnel effectively.
Test Enhanced Ecommerce Tracking
To verify that Enhanced Ecommerce is tracking correctly, navigate to the “Ecommerce” reports in Google Analytics (or the “Monetization” reports in GA4). Simulate user actions such as viewing product pages, adding items to the cart, and initiating the checkout process.
You can also use the Tag Assistant Chrome extension or GA Debugger to ensure all events are firing correctly. Check for errors in the Debug View of Google Analytics.
This process ensures that Google Analytics is properly integrated into your Shopify store. So you can track user behavior and eCommerce performance effectively.
If you need help integrating Google Analytics and ensuring the best results, hire Shopify developers from our team.
Key Reports to Monitor in Shopify Google Analytics
If you open your Analytics, you will see a lot of data. You may even be overwhelmed to see such a large volume of data. We have listed some of the major and common types of reports to monitor in Shopify Google Analytics:
Behavior Reports
Such reports help you understand the actions your visitors take, enabling you to plan better strategies for targeted upselling. It helps website owners make more informed decisions about how to organize their store, which features to add, and how to create better promotional bundles.
Behavior reports can provide useful information for:
- Online store speed
- Product recommendation conversions over time
- Top-selling store searches
- Sessions by landing page
- Sessions by device
- Online store cart analysis
Once you understand how visitors interact with your Shopify store, you can make better business decisions. Behavior reports help you plan how to stock your inventory, determine how to organize your products, and know which products are best-selling. You can plan the right marketing campaigns once you get insights through behavior reports.
Customer Reports
Customer reports provide information about your customers, such as their purchases, order values, average order count, order history, and more. These insights can also help you plan marketing campaigns to boost sales.
Types of customer reports you can generate:
- Customers over time
- Customers by location
- First-time vs. returning customer sales
- Returning customers
- At-risk customers
- Loyal customers
Marketing Reports
Marketing reports provide information on which marketing strategies generate the most traffic and sales, and how customers interact with the online store. It helps website owners plan the most effective marketing campaigns to drive more sales.
With Shopify’s marketing reports, you get:
- Sales achieved with specific marketing efforts
- Number of orders from first-time visitors
- Users who have not returned to your site since purchasing
- First interaction and last interaction data
Sales Reports
You will get information about the sales of your online store. You can check customer orders, initiated returns, completed returns, and other data to track your sales.
Shopify merchants get access to:
- Sales over time
- Sales by products
- Sales by product variant SKU
- Sales by checkout currency
- Sales by customer name
- Average order value over time
You get valuable information about the costs and profits of the products listed on your Shopify store. Website owners can get detailed insights into the profits generated by their store.
Types of profit reports Shopify website owners get:
- Profit by product
- Profit by product variant SKU
- Profit by Point of Sale location
Why These Reports Matter
By regularly monitoring these key reports, you can:
- Understand your audience and their preferences.
- Optimize marketing strategies to attract more visitors.
- Improve user experience and website performance.
- Boost sales and conversion rates by addressing weak points in your store’s performance.
Making data-driven decisions becomes easier when you focus on these actionable insights.
Remember to set up goals or conversions to track specific actions, like purchases or newsletter sign-ups, for more accurate measurement of your success. If you need help with these reports, get our Shopify development services for better integration and setup.
Wrap It Up
Integrating Google Analytics with Shopify provides a powerful framework for helping you with data-driven insights that can significantly impact your business’s growth. With this guide, you can move beyond simply knowing you’re getting traffic to understanding who your audience is through Audience reports, Acquisition reports, Behavior reports, and more.
With these GA Shopify reports, you can refine your product offerings, improve user experience, and ultimately drive more sales.
FAQ on Shopify Google Analytics
1. How do I find my Google Analytics Tracking ID?

Log in to Google Analytics, go to Admin > Data Streams, select your data stream, and locate the Measurement ID (for GA4) or Tracking ID (for Universal Analytics).
2. What is the difference between Universal Analytics and Google Analytics 4 for Shopify?
Universal Analytics tracks sessions and pageviews and is directly supported in Shopify. While Google Analytics 4 (GA4) Focuses on events and user-centric data and requires integration via Google Tag Manager.
3. Does Google Analytics track Shopify checkout steps?
Shopify’s default Google Analytics integration tracks checkout steps. Ensure that Enhanced eCommerce is enabled for detailed data on user activity during checkout.
4. How long does it take for Google Analytics to start showing data from Shopify?
Google Analytics typically starts displaying data within 24 hours of setting it up. Realtime data, however, is available instantly for verification.