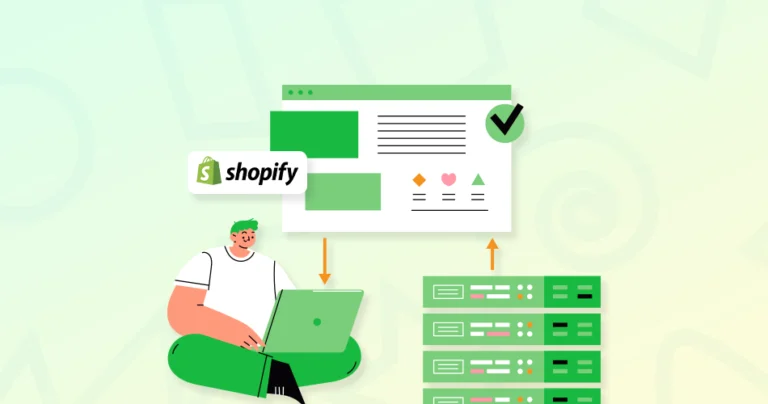
Shopify Migration Checklist: How to Plan, Execute & Launch Smoothly
Quick Summary
To ensure a seamless Shopify migration, start by meticulously auditing and cleaning all existing data. Configure your new store's settings, design, and apps beforehand. Execute a structured data import, then rigorously test for accuracy, functionality, and correct redirects. This disciplined checklist prevents data loss, protects SEO value, and ensures a smooth launch.
Let’s say your online store has outgrown its first home. Some features were once holding up well while they now limit your potential. At that point, you’ll need to upgrade to Shopify as a way for growth.
But of course, even the thought of moving years of products, customer data, search performance equity, can be daunting. And if you don’t migrate carefully, it may result in revenue loss, broken links, and a damaged customer experience. It’s not going to be a simple copy-paste task.
So through this blog, we’ll cover the Shopify migration checklist, including everything from the pre-planning and data prep to store setup and URL redirection. The aim will be to ensure there’s no loss of crucial data and preservation of search visibility. Let’s begin with the prep.
Preparation Before Shopify Migration
There are some crucial steps to be taken care of even before moving the first piece of data. Rushing this phase will most likely result in costly mistakes, downtime, and revenue loss. With good preparation, you can mitigate the risks and ensure your business is strengthened, not disrupted.
Define Goals & Scope
When we talk about how to migrate to Shopify, the first thing to do is define the goals and more importantly, the scope, including the priorities, budget, and timeline. You need to align the technical migration with the business objectives. Here are the key questions to answer:
Business Goals: Do you want better conversion rates, lower cart abandonment, or access to particular apps?
Technical Goals: Are you solving for slow page load speeds or poor uptime? Or are you trying to replace an outdated, difficult-to-manage backend?
Scope: Do you just want a simple, direct data transfer, or are you rebranding and redesigning the entire store? Basically, try to define the scope of the project.
A well-defined project will ensure the migration delivers tangible business value and is according to the owner’s imagination.
Choose the Right Shopify Plan
Your plan will dictate your costs, feature access, and transaction fees. If you don’t have the right plan, it can lead to unexpected expenses or feature limitations post-launch. Here are the key considerations.
Staff Accounts: How many of your team members need backend access? Compare the required number of logins with ones offered by Shopify’s plans.
Transaction Fees: If you’re using something other than Shopify Payments, each plan has a different external transaction fee. Calculate the economic value offered as per the sales volume and preferred processor.
Advanced Features: Requirements for third-party calculated shipping rates, advanced report building, or custom checkout scripts (e.g., for wholesale) may necessitate an Advanced or Plus plan.
Go for a cost-effective plan that supports your operational needs and growth projections without overpaying for unused features.
Backup Existing Store Data
Backup is like an insurance policy for your store. A complete backup ensures that no matter what happens during migration, you’ll be able to ensure no matter what happens during the migration, it’ll be easy to restore it. Here’s the action plan.
Export Data Manually: Use your current platform’s admin panel to export all critical data into CSV or XML files. That includes products, customers, orders, discounts, and blog content.
Database Backup: If you have admin access, perform a full database backup via hosting control panel (like cPanel) or using a database management tool like phpMyAdmin.
Secure Storage: Download and store these backup files in at least two secure, separate locations
Make sure you don’t delete any data or backup files until the new store is tested and live for the customers; even after that, wait for a few weeks until deletion.
Audit the Current Store
Now to another crucial part of the Shopify migration. You need to audit the existing store and create a checklist of what to migrate, what to delete, and what to fix before migration. This migration might serve as an excellent opportunity for optimization.
Let’s look at the critical areas to audit before Shopify migration.
Product: Review the SKUs, descriptions, images, variants, and meta tags. Identify discontinued items or duplicates for cleanups.
Customers: Not any custom fields or segmentation data that needs to be preserved. Like customer tags, notes, etc.
Content: Inventory all pages (About, Contact, FAQs), including the blog posts and legal pages (Terms of Service, Privacy Policy).
SEO Elements: Analyze every page or URL with help from Screaming Frog or another crawler tool. Note down each page’s title tag, meta description, and H1. This will later help in setting up 301s.
App/Integrations: List every 3rd party tool (environment, email marketing, CRM, and analytics) and their method of connection to your store (API keys, maybe?). These connections, you will have to re-establish on Shopify.
Investing time in this phase of the process will ensure the subsequent technical phases are smooth, controlled, and more successful.
Data Migration Preparation for Shopify
The integrity of your data is the most critical element of your entire migration. A single error in transferring product variants or customer records can lead to significant operational disruption and erode customer trust.
This phase is not about a simple bulk export and import; it is a structured process of data extraction and transformation. So is to ensure every piece of data and information is migrated to the new store accurately. Let’s discuss the prep to be done for Shopify data migration.
Extract & Clean Your Data
Begin by exporting your data into manageable formats, typically CSV files.
Product Data: Export all SKUs, titles, descriptions, prices, inventory counts, variants, images, and collections.
Customer Data: Extract customer emails, names, addresses, and any stored phone numbers. Note: You will typically only be able to migrate unencrypted customer passwords from specific, supported platforms.
Historical Data: Decide which order history, discount codes, and blog content are essential to migrate. This is a prime opportunity to archive obsolete information.
Transform and Map Your Data
Shopify requires data to be organized in a specific structure. This is the most crucial step.
Reformat CSV Files: Meticulously map your current column headers to match Shopify’s required import format. Use Shopify’s sample CSV files as a guide.
Standardize Information: Ensure data consistency—for example, formatting all country codes to a two-letter standard (e.g., US, CA, UK).
Handle Images: Plan for product image migration. While some apps can transfer images directly, you may need to host them on a CDN and import them via URL.
Choose and Test Your Migration Method
Never perform a full data import without a test run.
Select a Tool: Consider any well-reputed method: a certified migration app (e.g., Matrixify, Excelify), a Shopify Plus Partner, or Shopify’s native importers.
Execute a Test Migration: Import a few items (say, 20-50 products) into a development or password-protected store. Look at each field, checking for errors in formatting, linkages of variants, image placement, etc.
Validate the Test: Test-data reviewers from various departments of the company (e.g., sales, marketing) will catch oversights.
Well-validated, thoroughly cleaned, and formatted data will save you from a catastrophic failure once you go on-air. It’ll continue to ensure business continuity and data integrity from day one.
Export Data From the Old Platform
An essential first step towards seamless migration is a clean, complete export. Depending on your current platform, you can export it in various ways. But the goal of the data export remains simple: to get well-structured data files that can be properly transformed for Shopify.
If one rushes anything or takes incomplete data, there will be a plethora of problems later.
Locate Native Export Tools
Most of the popular marketplaces will have built-in tools for data export.
Where to Look: Navigate to your admin dashboard and look for “Export”, “Data”, “Advanced”, or “Tools” sections.
What to Export: Use the native tools to export separate CSV files for:
Products: This CSV file must include all variants, options, SKUs, prices, and descriptions.
Customers: A customer export usually includes names, emails, addresses, and phone numbers.
Orders: Historical order data is valuable for records, but is often the most complex to migrate.
Platform Examples:
BigCommerce: Admin Menu > Advanced Settings > Import/Export.
If your native export tool is limited or doesn’t export all necessary fields, check your app marketplace. Type in searches such as “export”, “data migration”, or “CSV export”.
These specialized tools tend to have better options for exporting, such as allowing you to include custom fields, specific product types, or complete customer records. The native tool could otherwise overlook these.
Manual Review and Organization
Once exported, your work is not done. Before moving to the transformation phase, you must:
Audit the Files: Open each CSV and look for obvious errors, missing columns, or corrupted data.
Consolidate Data: Should the data be scattered through numerous exports or files, start sorting it into major categories: one master file for products, one for customers, etc.
Secure Your Data: Place these exported files at some secure backed-up location. This location will be your source of truth throughout the migration exercise.
Shopify provides detailed step-by-step instructions to guide you through the migration process from dozens of popular platforms. So take your time to export correctly and prevent the costly and time-consuming need to halt migration to fix bad data.
Clean & Organize the Data for Shopify
Exporting the data just starts the process; you can’t really have raw data as it won’t be in the correct format. Cleaning the data and organizing it transforms your disparate export files into a Shopify-ready dataset.
Standardize Formatting
Inconsistent formatting creates errors upon import. Audit your data for uniformity. Ensure all dates follow the same structure (e.g., YYYY-MM-DD). And country and state codes use a consistent format (e.g., ‘US’ not ‘USA’ or ‘U.S.A’).
Plus, currency symbols are removed, leaving only numerical values. This prevents Shopify from misinterpreting your data.
Map & Rename Headers
Shopify’s importer requires specific column names to recognize data. Your current export file will have its own header names. You must meticulously rename your columns to match Shopify’s required format (e.g., changing “Prod_Name” to “Title”, “Stock_Qty” to “Inventory Quantity”).
Use Shopify’s official import template as your guide to ensure every field maps correctly.
Eliminate Duplicates
Migrating duplicate records, especially for customers or products, corrupts your new store’s data integrity. Before importing, sort your CSV files by key fields like SKU and customer email address.
Identify and delete any exact or near-identical duplicate entries to ensure a clean, accurate database from day one.
Validate Critical Fields
Certain fields are essential for store functionality. Scrutinize these for accuracy:
SKUs: Must be unique for each product variant.
Emails: Must be in a valid format (e.g., name@domain.com).
URL Handles: Should be web-friendly, without spaces or special characters (use hyphens instead).
Invalid entries here can break your product pages or customer communications.
Handle HTML & Special Characters
Product descriptions often contain HTML code for formatting. Shopify accepts HTML code in its “Body HTML” field, but embedded styles could potentially clash with your new theme.
There is no way to import images as files into Shopify directly; instead, hosting the images on-line somewhere and importing them by URL is a must. More than likely, your export will contain local file paths (e.g., /images/product.jpg).
Everything must now be uploaded to a CDN. Replace all the local paths in the CSV with the new, publicly accessible URL so that the visuals may be smoothly migrated.
Map Data to Shopify Structure
Data mapping involves mapping your existing data fields to Shopify-specific requirements. Incorrect mapping is the primary cause of imports failing, misplaced data, and post-migration cleanup headaches.
If performed correctly, this step ensures the seamless transition of your products, customers, and content into their new structure.
Use Shopify’s Template as Your Guide
Do not guess the required format. Download the sample CSV import files directly from your Shopify admin (Settings > Import > Download example file). This template carries the exact column header and data structure that Shopify expects, thus serving as your absolute blueprint for mapping.
Prioritize Core Product Fields First
Focus your initial effort on accurately mapping the foundational elements that define a product. Ensure these columns from your old export are correctly renamed to match Shopify’s:
Each unique combination of Option values must have its own row in the CSV, with a unique SKU and specific price/inventory for that variant.
Plan for Metafields and Custom Data
Standard product fields may not capture all your data (e.g., a product’s warranty length or a customer’s loyalty tier). For this custom data:
Identify which unique attributes need to be migrated.
Plan their import strategy, which may require using a dedicated migration app, Shopify’s native metafield import (via API), or a third-party app post-migration.
Conduct a Rigorous Test Import
Never map your entire inventory and import it blindly. The single most important practice is to:
Create a test file with a small batch of products (5-10), including a product with multiple variants.
Import this file into a development or password-protected store.
Thoroughly inspect the test products. Check that all data landed in the correct fields, variants are properly structured, and images are visible.
Use the results to refine your mapping before the full migration.
Treat data mapping as a precise, test-driven process. That will help transform a potentially chaotic import into a predictable and successful operation.
Setup the Shopify Store
Primarily, migration to Shopify entails much more than designing and orchestrating moving data from the days of classic code. That is, especially when at the end you have to keep options working and optimized for the new store on top. Before importing products to Shopify, finish the storefront setup.
In this phase, you will set up the basic configurations, design, and infrastructure upon which your migrated data will rely. Let’s discuss in brief the Shopify setup guide.
Configure the Core Admin Settings
Set up the operational backbone of your store. In your Shopify admin panel, you configure:
Shipping: Set shipping zones, rates, and, if any, carrier integrations.
Taxes: Enable tax settings for automatic calculations depending on your area and product types.
Payment Gateway: Enable your payment processor (Shopify Payments, PayPal, Stripe, etc.) and test it to guarantee it processes transactions.
Store Policies: Create and publish your legal pages: Refund Policy, Privacy Policy, and Terms of Service.
Design & Customize Your Theme
Your store’s design dictates the customer experience. Don’t import data into a blank template.
Select a Theme: Choose a new Shopify theme from the Shopify Theme Store or repurpose your existing theme. You can also take expert help to create a custom Shopify theme for your new eStore
Apply Branding: Upload your logo, choose your color palette, and set fonts so they reflect your brand identity.
Customize Layouts: Build important pages like Home, Product, Collection, and configure navigation menus.
Install Essential Apps
The apps you need to survive as a business on Day 1 are all set to be installed. In the Shopify app store, identify apps your eStore needs.
Focus on core functionalities such as reviews, email marketing, loyalty, inventory, and analytics.
Installing apps before launch allows you the time to configure them, so they will be ready to work with your migrated data straight away.
Prepare for Launch
A final pre-flight check is crucial. Here’s all you need to do while testing before launch.
Remove Password Protection: Your store is initially password-protected. Remember to disable this to go live.
Test Transactions: Place test orders using a mock payment gateway to confirm the checkout process works flawlessly.
Review on Mobile: Thoroughly check your site’s functionality and appearance on mobile devices.
Completing this setup will help create a polished, full-functional store for your customers. After the store is ready, you can work on importing the data for a whole new migrated store.
Want help with setting up the best Shopify store for migrating your existing one? Then consult with our Shopify development company.
Data Import & Verification for Shopify Migration
The import phase is where your meticulous preparation is put to the test. Rushing over this step may undo everything attempted before it. A very cautious, duly substantiated approach has to be implemented to preserve data integrity. And it will ensure that your customers enjoy a smooth experience as soon as their brand-new store opens.
Execute a Staged Data Import
DO NOT import all your data at once! Use a staged approach to lessen any possible risk and to effectively troubleshoot should any issue arise.
Order of Operations: Import data in this order so that dependencies are met.
Products & Collections: Build your store’s catalog first.
Customers: Add your customer database.
Historical Data: If necessary, import past orders and other records.
Use Your Chosen Tool: Whether using Shopify’s native importer, a certified app, or the API, follow the specific instructions for your selected method. (For CSV files, carefully map your cleaned and formatted columns to Shopify’s fields during the upload process.)
Monitor for Errors: The import tool will give you an error report for any rows that failed. Address these errors immediately before proceeding.
Conduct Meticulous Post-Import Verification
Assuming a successful import is a critical mistake. You must audit every data type.
Product Audit:
Check a significant sample of products for correct titles, descriptions, prices, and images.
Verify that all variants (size, color) are present and have correct SKUs and inventory counts.
Test collection pages to ensure products are categorized correctly.
Customer Data Check:
Spot-check customer profiles for accurate information.
If passwords were migrated, test the login process for several customer accounts.
Critical Function Testing:
Test Checkout: Add products to cart and complete the checkout process using the test mode of your payment gateway. Confirm that order confirmation emails are sent.
Search & Navigation: Test your onsite search and filter functions to ensure they return the expected results.
URL Redirects: Test hundreds of old product and page URLs to ensure that 301 redirects you mapped are really working so SEO value is preserved.
This rigorous import and verification process is the final safeguard against data loss and functional errors. That ensures your new Shopify store launches with confidence and accuracy.
SEO & URL Redirection for the New Shopify Store
At this point, you need to understand that when you transfer the website to Shopify or any new platform, there’s going to be an impact on the search rankings. Protecting your SERP visibility is a non-negotiable part of a successful migration. To search engines, a new platform with new URL structures is an entirely new website.
So without a strategic plan, years of accumulated SEO equity can vanish overnight, leading to a dramatic loss of organic traffic and revenue.
Execute a Comprehensive SEO Audit and Mapping
Before any data is moved, you must create a complete blueprint of your current site’s SEO landscape.
Export Your Existing URLs
Use tools like Google Search Console, Screaming Frog, or your platform’s sitemap.
Generate a list of every important URL on your current website.
This includes product pages, blog posts, collection pages, and landing pages.
Map Old to New
Find the exact new equivalent URL on your Shopify store for each old URL.
Since Shopify’s URL structure is usually different (for instance, /clothing/t-shirt versus /products/t-shirt), it is important not to skip this step.
The mapping should be maintained within a spreadsheet having two columns: “Old URL” and “New Shopify URL”.
Implement 301 Redirects Meticulously
A 301 redirect serves the purpose of informing search engines and browsers, permanently, that a page has shifted to a new location. This is the paramount method used to transfer link juice and to foil any frustrating 404 errors from users.
Use Your URL Map: Your spreadsheet is now your redirect instruction manual.
Choose Your Method: Implement these redirects in bulk using:
Shopify’s Native Redirects File: Import a CSV file named redirects.csv via the Shopify admin (Settings > Files).
A Dedicated Redirect App: For large, complex sites, a specialized app can provide more powerful management tools.
Test Thoroughly: After implementation, manually test a wide sample of old URLs to confirm they seamlessly redirect to the correct new pages without errors. This final check safeguards your organic traffic.
Test the New Shopify Store Before Launch
A final, comprehensive test is the critical barrier between a successful and unsuccessful launch. It is a stage meant to validate all that has been done so far. It verifies that every single customer interaction is working in full operation. Never skip this important step.
Conduct End-to-End User Testing
Try to simulate the whole customer journey and find out if the links break at some point or if there is a dysfunction.
Navigation & Search: Test all menus, filters, and search bars, and check if the results are correct and if the pages are loading okay.
Product Pages: Check that images zoom properly, that product variations like size or color select properly, and that add-to-cart buttons are operational.
Cart & Checkout: Put items in the cart, checkout, and submit a test payment through a mock payment gateway. Check if all steps are fairly straightforward and free of errors.
Account Creation: Test to see if creating a new account and logging in works fine.
Perform Technical & Functional Checks
Scrutinize the behind-the-scenes operations that power the customer experience.
Form Testing: Submit all forms (contact, newsletter signup) to see that a confirmation message will appear and send a possible notification to the administrator of the site.
Email Notifications: Confirm that automatic emails are sent for order confirmation, shipping updates, and password reset. Ensure the correct formatting of these emails.
App Functionality: Test each installed app for compatibility with your live data and to understand conflicts with your theme.
Speed & Mobile Performance: Use tools like PageSpeed Insights to analyze load times to make sure your store responds well on different mobile devices.
Execute a Pre-Launch SEO Audit
Protect your organic visibility with a final check.
Crawl Your Site: Crawl your password-protected store with something like Screaming Frog. Look for broken links, missing meta titles/descriptions, and incorrect redirects.
Validate Redirects: Test a sample of your old URLs to ensure the 301 redirects are perfectly executing to the new pages.
Review Structured Data: Use Google Rich Results Test to confirm proper implementation of product schema markup.
By methodically testing every element, you launch with confidence. That means a flawless experience for your customers from the very first visit.
Checklist to Take the New Shopify Store Live
This will be your final pre-flight check. A proper checklist will ensure a professional launch and prevent typical post-go-live errors.
Pre-Launch Final Audit
Review Site Password: Make sure the site is password-protected until the time you are 100% ready to launch.
Test All Redirects: Check that important 301 redirects from old URLs are functioning correctly.
Confirm Payment Gateway: Set the payment processor from test mode to live mode and run the last successful transaction.
Proofread Content: Do a final check of typos or formatting issues on major pages such as home, product description, and policies.
Launch Sequence
Disable Password Protection: From the Shopify admin, go to Online Store > Preferences and uninstall your password.
Publish Your Domain: If you are using a third-party domain, publishing means pointing it to your new Shopify store through DNS settings.
Disable Crawler Blocking: Remove password.txt or noindex directives in your robots.txt file if you want search engines to index your site.
Now your store is live and running. But the story doesn’t end there. You need to monitor your store and its performance for regular optimization.
Optimize the Shopify Store Post Migration
Your migration is complete, but your work isn’t done. The post-launch period is critical for monitoring performance, capitalizing on your new capabilities, and building a foundation for sustained growth.
Monitor & Fix Issues
Vigilantly watch your site for any teething problems in the first 48-72 hours.
Track Site Speed: Temporary deterioration in performance can occur post-migration. Thus using tools like GTmetrix or PageSpeed Insights to check the site speed is suggested.
Review Error Logs: Causes that lead to failed checkout attempts or 404 errors must be checked through reports on Shopify, as they signify broken redirects or links.
Solicit Feedback: Have a few loyal customers go through the site for bugs or confusing elements.
Execute a Marketing & Growth Strategy
Leverage your new platform’s features to re-engage your audience and drive growth.
Launch a Re-engagement Campaign: Use email marketing to announce the launch of your shiny new site and highlight the improved features, giving special launch promotions.
Audit Paid Campaigns: Audit all paid campaigns, whether on Google or Facebook, to update destination URLs to the new Shopify links so as not to pay for 404s.
Explore New Apps: With the big migration out of the way, it’s time to explore apps for advanced marketing (subscriptions, loyalty, UGC) that weren’t part of the initial setup.
Commit to Continuous Improvement
Treat your new store as an evolving sales engine, not a finished project.
Analyze Analytics: Deep dive into Shopify reports to discover hidden nuggets of opportunity from customer behavior, top products, and sales trends.
A/B Test: Use the newfound flexibility to A-B test product pages, CTAs, and promotions, driving systematic improvements in conversion rates.
Plan for Scalability: As you grow, regularly review your app stack and theme code for efficiency, ensuring your store remains fast and manageable.
And that’s it. That’s the Shopify migration checklist. If you want professional help with this entire procedure, get our Shopify migration services.
Let’s Summarize
A successful Shopify migration is more than a technical lift; it’s a strategic investment in your business’s future.
While the process demands careful planning—from data auditing to rigorous testing—each step builds the foundation for a more powerful, scalable, and efficient store. You won’t just move platforms; you’ll position your brand for sustained growth, equipped with robust tools and a seamless CX. Now, with your Shopify store live, you’re ready to grow your business. And if you need help with it, connect with our expert today!
FAQs on Shopify Migration Checklist
Q1. Will my SEO be hurt by migrating to Shopify?
Not if you properly implement 301 redirects from your old URLs to your new ones. This tells search engines your content has moved permanently, preserving your rankings. A well-executed migration can often improve SEO due to Shopify’s strong technical foundation.
Q2. How long does a full migration typically take?
A simple store can be migrated in a few days. For a complex store with thousands of products and custom data, the planning, testing, and execution can take several weeks. Rushing the process is the biggest cause of errors.
Q3. Do I need a developer to migrate to Shopify?
It depends on your store’s complexity. Basic migrations can be done by a merchant using a migration app. Stores with custom functionality, complex data, or requiring theme customization will benefit greatly from a Shopify Expert or developer.
Ankur is a highly experienced E-commerce Platform Expert dedicated to maximizing the online potential of businesses. His deep knowledge spans across leading platforms, including Shopify, Magento, and WooCommerce, among many others. Ankur specializes in guiding companies to effectively leverage these technologies and their capabilities to drive significant growth and success for their online ventures.
At BrainSpate, we recognize the power of standing out from the crowd in an effort to get more customers and product admirers. For that, you can have a consultation with us and get a free quote.