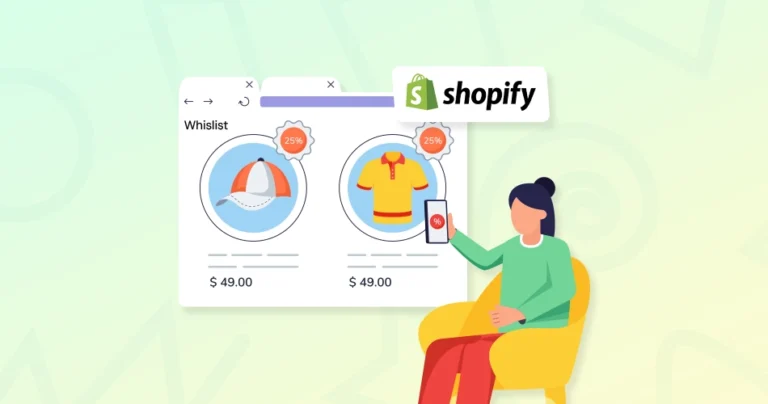
A wishlist is one of the quietest but highest-converting features in your Shopify store. It lets customers save favorites, compare products, and return when they’re ready to buy, while providing you with valuable insights into what they love.
The good news? There are multiple ways to add a wishlist in Shopify, whether you prefer a quick, no-code app or a fully customized feature. Many brands collaborate with professional Shopify developers to create a wishlist experience that integrates seamlessly into their storefront and customer journey.
In this guide, we’ll explore all the options and show you how to add a wishlist in Shopify. Let’s begin.
Why You Should Add a Wishlist in Shopify?
Adding a wishlist to your Shopify store isn’t just about giving customers a “save for later” option; it’s about creating a more thoughtful customer experience on your eStore. A wishlist bridges product discovery and purchase, delivering value to both the shopper and the store owner.
The purpose of Shopify wishlist functionality goes beyond mere product organization for consumers. Theyinfluence when users decide to buy, how likely they are to convert, and how they respond to marketing messages from retailers. Here’s why it’s worth implementing:
Improves customer experience: Shoppers often browse without purchasing on their first visit. A wishlist lets them save favorite items for later, so they don’t have to remember product names or search again. This creates a smoother, more enjoyable shopping journey.
Boosts return visits and sales: When customers save items they love, they have a reason to come back. Shopify Wishlists turn browsers into repeat visitors, often leading to higher conversion rates and average order values.
Enables personalized marketing: Wishlist data gives you insight into what customers want. You can use it to send targeted emails, reminders, or special offers, increasing the chance they’ll complete their purchase.
Provides product popularity signals: Knowing which products are frequently added to wishlists helps you spot trends and understand customer demand. This data can guide decisions around inventory, promotions, and merchandising.
Reduce Cart Abandonment: For undecided buyers who are not ready to convert on the first visit, the wishlist keeps the purchase intent alive. With unmatched remarketing opportunities, this feature keeps customers returning to compare products, rethink choices, and convert at their comfort and pace.
Collect Customer Preferences: Wishlist provides niche-level data to transparently analyze product performance, enabling refined stock decisions, marketing campaigns, and personalization strategies. It becomes easy to track actual shopper behavior and demand patterns rather than relying on broad analytics.
Enhance User Experience: Deliver a smooth, flexible shopping journey for your buyers, eliminating the pressure to purchase immediately. This creates a comfortable, intuitive store experience, especially useful for large catalogs and mobile users, where browsing efficiency matters. It also aligns with modern Shopify wishlist setup guide practices and cross-platform approaches, such as integrating a wishlist across Shopify and WooCommerce.
In short, learning how to add a wishlist in Shopify can help engage your customers and boost sales. Next, let’s explore the different ways to implement a Shopify wishlist.
Methods to Add a Wishlist in Shopify (Implementation Guide for Developers)
Surprisingly, you don’t get an out-of-the-box wishlist feature on Shopify. However, there are three methods for integrating wishlists, depending on your scalability needs, budget, and control requirements.
Many brands collaborate with professional Shopify developers, sometimes through dedicated eCommerce implementation support, to create a wishlist experience that integrates seamlessly into their storefront and customer journey.
Before you add advanced features such as wishlists, ensure your store is fully populated. Here’s a step-by-step guide on how to import products to Shopify to get your catalog up and running smoothly.
Wishlist systems generally fall into three architectures:
App-based implementation (fastest deployment)
Client-side storage (LocalStorage for guest users)
1. App-Based Wishlist Implementation (Recommended for Most Stores)
Best for: Rapid deployment, non-technical teams, and feature-rich requirements.
Apps handle all the abstract backend logic for you and come with ready-made UI elements, analytics, and integrations, so you don’t need to modify any theme code.
document.addEventListener('click', function (e) {
 if (e.target.classList.contains('add-to-wishlist')) {
   const productId = e.target.dataset.productId;

   let wishlist = JSON.parse(localStorage.getItem('wishlist')) || [];

   if (!wishlist.includes(productId)) {
     wishlist.push(productId);
     localStorage.setItem('wishlist', JSON.stringify(wishlist));
   }
 }
});
Step 5: Rendering Wishlist Items
On the wishlist page:
Read stored IDs from localStorage
Fetch product data via:
Storefront API (recommended), OR
Preloaded product JSON mapping
Developer Tip: Shopify Liquid alone cannot read localStorage. Rendering must be handled via JavaScript.
3. Persistent Wishlist Using Customer Accounts (Metafields + APIs)
Best for: Cross-device sync, logged-in users, and enterprise-scale implementations.
Shopify customer account wishlist implementation is the most reliable setup for real-world production use. For example, a Shopify wishlist system that needs to work consistently across multiple devices, user sessions, and logged-in customer accounts without data loss or performance issues.
Must be executed server-side (Admin API preferred)
Requires an authenticated session (Customer Access Token or Admin credentials)
Enables:
Cross-device syncing
Personalized marketing automation
CRM segmentation
Final Developer Notes: – Shopify OS 2.0 themes should use JSON templates + sections (not legacy .liquid page templates) – LocalStorage must be paired with JavaScript rendering logic (Liquid cannot access browser storage) – App-based solutions should prefer Theme App Extensions over manual script injection – API-based wishlist systems must always respect authentication and data scope boundaries
This concludes our implementation lesson on how to add a wishlist in Shopify, using apps for a no-code approach or custom development pipelines. Once your architecture is successfully deployed and operational, the next step is to use this feature to generate revenue directly.
Need a Custom Wishlist Functionality for Your Shopify Store? We Can Help!
Wishlist Tips & Strategy to Boost Shopify Conversions
A Shopify wishlist is much more than just a customer convenience feature. When implemented correctly, it can directly increase revenue, customer retention, and average order value.
Let’s look at some of the most useful tips:
1. Use Wishlist Data for Personalization & Targeted Campaigns
Wishlist activity can help identify your high-intent products. Prioritize this data and use it in your marketing workflows.
Trigger price drop alerts when wishlist products go on discount
Send restock notifications for unavailable items
Build personalized email campaigns based on saved items
Recommend complementary or higher-value alternatives
Shopify Wishlist Plus and other AI-powered wishlist tools seamlessly connect wishlist activity to email and CRM systems. This smart strategy helps when you’re figuring out how to add a wishlist in Shopify, transforming curious browsers into purchase-ready customers.
2. Make the Wishlist Entry Point Visible and Intent-Driven
Ensure the wishlist feature is easy to find on your eCommerce store by placing the buttons strategically to influence purchase decisions.
Most recommended placements:
Next to the Add to Cart button on product pages
On collection cards for quick saving
Inside navigation as a heart icon (“My Wishlist”)
Keep the CTA language direct:
“Save to Wishlist”
“Add to Favorites”
“Save for Later”
“Buy it Later”
The primary goal is to remove confusion once a product is selected, reassure the user, and ensure a smooth, uninterrupted checkout flow.
3. Use Wishlist Reminders to Increase Customer Lifetime Value
Wishlist reminders can be used strategically to maximize customer retention and repeat purchases on your eCommerce store.
Example flow:
A user saves a $200 pair of Adidas sneakers during a weekend sale → price drops to $150 after a promotional campaign → automated email alert is triggered → user returns from the email link → completes the purchase.
Due to timing or varying prices, not every purchase gets completed. This strategy brings the user back to your store, increasing customer lifetime value (CLV) with ease. Furthermore, it strengthens brand loyalty because the business-to-consumer communication feels personalized.
4. Track Wishlist Behavior Like a Performance Channel
Wishlist data can be used to extract precise, meaningful insights into customer behavior and product demand.
Key tracking points:
Wishlist additions vs actual purchases
Conversion rate from wishlist to checkout
Highly saved but low-purchased products
Segment the audience based on the wishlist intent level
This data helps refine pricing and promotional strategy. For example, a product that is frequently wishlisted but rarely purchased may indicate pricing friction, an unclear value proposition, or the need to improve product descriptions and positioning.
5. Use Wishlist as a Demand Signal for Merchandising
Wishlist data can be used for forecasting and merchandising decisions.
Improve forecasting and merchandising strategies with wishlist data, letting you understand your products in a new light.
Practical applications:
Identify trending products before they peak
Plan seasonal collections (e.g., “Summer Favorites”)
Highlight “Most Wishlisted Items” as social proof
Prioritize marketing spend on the most saved products
This helps predict product demands, transforming the wishlist from just a UI feature to a marketing guideline.
6. Improve UX to Reduce Drop-Off Between Save and Purchase
Even with a highly functional Shopify wishlist setup, a poorly planned UX can negatively impact your conversions.
Ensure:
The wishlist page includes a clear “Add to Cart” option
Users can move items between the wishlist and the cart in one click
Wishlist persists across sessions (logged-in or guest, depending on implementation)
Mobile experience mirrors desktop functionality
This is especially important when comparing visitor vs. session behavior in Shopify, where returning users often convert through wishlist-to-cart connections.
At first glance, it may look like the wishlist feature is beneficial only to users. But with strategic implementation, it can become a conversion engine for your eCommerce store. Next, we’ll wrap up with a quick summary of how properly implemented Shopify wishlist functionality improves both user experience and revenue. If you don’t have the skills or expertise to handle this procedure, consult our professional Shopify development agency.
Wrap It Up
Understanding how to add a wishlist in Shopify can greatly enhance customer experience and boost sales. Whether you choose a simple app or a custom-coded solution, wishlists help shoppers save their favorite products and return to complete purchases.
By evaluating various implementation methods, including browser-based localStorage for persistent API integrations, you can select the approach that best aligns with your store’s technical requirements and brand goals.
Beyond simple convenience, a well-executed wishlist serves as a powerful engine for personalized marketing and provides critical insights into product popularity, helping you make data-driven decisions for your business.
FAQs on Adding a Wishlist in Shopify
1.How do I add a Wishlist in a Shopify header?
Add the wishlist icon by editing your theme’s header.liquid file or using a wishlist app with header support. Place the icon near the cart for easy access. Many apps like Wishlist Plus let you add this without coding.
2.How do I change my Wishlist icon on Shopify?
To change your wishlist icon on Shopify, replace the current icon’s image or SVG file in your theme assets. Update the code or CSS that displays the icon to use your new one. Some apps also let you upload custom icons via settings.
3.How do I remove the Add to Wishlist button on Shopify?
To remove the Wishlist button on Shopify, check the app settings if you are using an app for the wishlist. For custom code, delete or comment out the button code in product templates. Or hide it with CSS using display: none; on the button’s class.